HTTPS is more and more common-place, not just for public websites but also for internal websites. This is extremely good for a number of reasons, but from an administration standpoint there are a few bits to keep in mind.
In particular, when it comes to Team Foundation Server this is a list of errors and problems that go away with a common denominator: the right certificate.
The number one offender is of course the out-of-domain machine. If you have a domain-joined machines these problems simply do not happen because the internal certificate is deployed by the domain GPO - hence you don't have to fiddle with it. When your machine is not domain-joined, things can easily go south.
Bear in mind - these are not security tips, this is just a collection of situations which you will face if you deploy HTTPS with TFS.
If you don't have your certificate installed on both the Agent (if outside the domain) and the target machine (again, if outside the domain) then you will get this cryptic error:
The running command stopped because the preference variable "ErrorActionPreference" or common parameter is set to Stop: Exception calling ".ctor" with "2" argument(s): "One or more errors occurred."
C:\>git clone https://myserver/Collection/_git/Project
Cloning into 'Project'...
fatal: unable to access 'https://myserver/Collection/_git/Project/': SSL certificate problem: unable to get local issuer certificate
In particular, when it comes to Team Foundation Server this is a list of errors and problems that go away with a common denominator: the right certificate.
The number one offender is of course the out-of-domain machine. If you have a domain-joined machines these problems simply do not happen because the internal certificate is deployed by the domain GPO - hence you don't have to fiddle with it. When your machine is not domain-joined, things can easily go south.
Bear in mind - these are not security tips, this is just a collection of situations which you will face if you deploy HTTPS with TFS.
Non domain-joined machines
If you are running a non domain-joined machine then you need to procure the root certificate for your domain and install it in the Trusted Root Certification Authorities store on your machine. This needs to be done on any machine not part of your domain, otherwise you won't be able to do pretty much anything.
Build agents
Build agents need to be reconfigured. You can't run away from this, if you don't do that they will be working until the authentication token expires, and then you will start seeing this error in the Event Log after they go offline:
Agent connect error: The audience of the token is invalid.. Retrying every 30 seconds until reconnected
You need to de-register (config.cmd remove) and re-register your build agents in any pool. Not too bad, but it needs to be planned for.
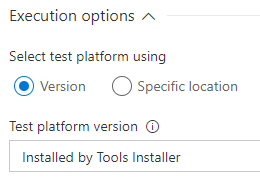
The Deploy Test Agent task in Build and Release
If you don't have your certificate installed on both the Agent (if outside the domain) and the target machine (again, if outside the domain) then you will get this cryptic error:The running command stopped because the preference variable "ErrorActionPreference" or common parameter is set to Stop: Exception calling ".ctor" with "2" argument(s): "One or more errors occurred."
It's a communication issue between the target machine and TFS. Once the certificate is installed it goes away and the task works normally. This GitHub issue also recommends enabling TLS v1.2, which is not a bad idea.
Git
Git holds a special spot in this collection, because of how it handles SSL. While newer versions of Git for Windows made this really straightforward (hint: they support the Windows Credential Manager), but if you aren't running the latest and greatest then this is what could happen with Git on your local machine, even if it is joined to the domain:
C:\>git clone https://myserver/Collection/_git/Project
Cloning into 'Project'...
fatal: unable to access 'https://myserver/Collection/_git/Project/': SSL certificate problem: unable to get local issuer certificate
You can sort this out in many ways, but the best one is Philip Kelley's approach. It just works, even if it is a bit of a walkthrough. This applies not only on the client, but also on the build agent if you are not running a recent version of the agent itself. It can be easily corrected by replacing the ca-bundle.crt file over there, it is not going to be replaced until you update the agent to a newer version.
error: RPC failed; curl 56 OpenSSL SSL_read: SSL_ERROR_SYSCALL, errno 10054
fatal: read error: Invalid argument, 255.05 MiB | 1.35 MiB/s
fatal: early EOF
fatal: index-pack failed
It can be all sorts of things, especially as the error points at OpenSSL - but check your connection's stability first before messing up with Git's postBuffer and compression 😃 if the git clone operation starts the problem is not the SSL authentication.
Also, a false friend:
fatal: read error: Invalid argument, 255.05 MiB | 1.35 MiB/s
fatal: early EOF
fatal: index-pack failed


